How to Bake Bread on the Trail with a Titanium Pot: Easy Backpacking Recipe & Step-by-Step Guide
Introduction
Backpacking enthusiasts often crave warm, freshly baked bread after a long day of hiking. This guide explains how to prepare a simple loaf using a lightweight titanium pot, allowing one to enjoy homemade bread without excessive gear weight. One will learn the essential ingredients, preparation techniques, and cooking methods that adapt traditional baking to a campfire environment. The result is a nutritious, comforting staple that enhances morale and energy during extended treks.
What You’ll Need
- 1 × Titanium Camping Pot (750 ml capacity, 123 g)
- Portable stove or campfire with stable base
- Aluminum foil or a silicone baking mat
- Measuring cup and spoon (lightweight plastic or metal)
- Mixing bowl with lid (optional)
- Basic bread ingredients: flour, instant yeast, salt, sugar, water, and oil
- Heat‑resistant gloves
Step 1 – Prepare the Cooking Area
Before lighting a fire, one should select a flat, fire‑safe surface away from flammable material. A portable stove provides consistent heat, while a small campfire offers a rustic experience; either option works with the titanium pot. Place a stable rock or metal trivet beneath the pot to prevent direct flame contact, which could cause uneven heating. Ensure the area is well‑ventilated and that local regulations permit open flames.
Step 2 – Assemble the Ingredients
Gather the following quantities for a single‑serve loaf: 200 g all‑purpose flour, 1 g instant yeast (approximately ¼ tsp), 3 g salt (½ tsp), 5 g sugar (1 tsp), 120 ml warm water (110°F/43°C), and 10 ml olive oil (2 tsp). The use of instant yeast eliminates the need for a proofing step, simplifying the process for backpackers. Measure each component accurately; a small digital scale is recommended for consistency.
Step 3 – Mix the Dough
Combine flour, yeast, salt, and sugar in the mixing bowl. Add warm water and olive oil, then stir with a lightweight spoon until a shaggy dough forms. The titanium pot can serve as a mixing vessel if a separate bowl is unavailable; its smooth interior prevents sticking. Once the ingredients are incorporated, cover the bowl with its lid or a piece of foil to retain moisture.
Step 4 – Knead and Rest
Knead the dough directly in the pot or bowl for approximately two minutes, pressing and folding until the mixture becomes elastic and smooth. Over‑kneading is unnecessary for a simple loaf; the goal is to develop enough gluten for structure. After kneading, allow the dough to rest for 10‑12 minutes in a warm spot; the instant yeast will begin fermentation, causing the dough to rise slightly.
Step 5 – Shape the Loaf
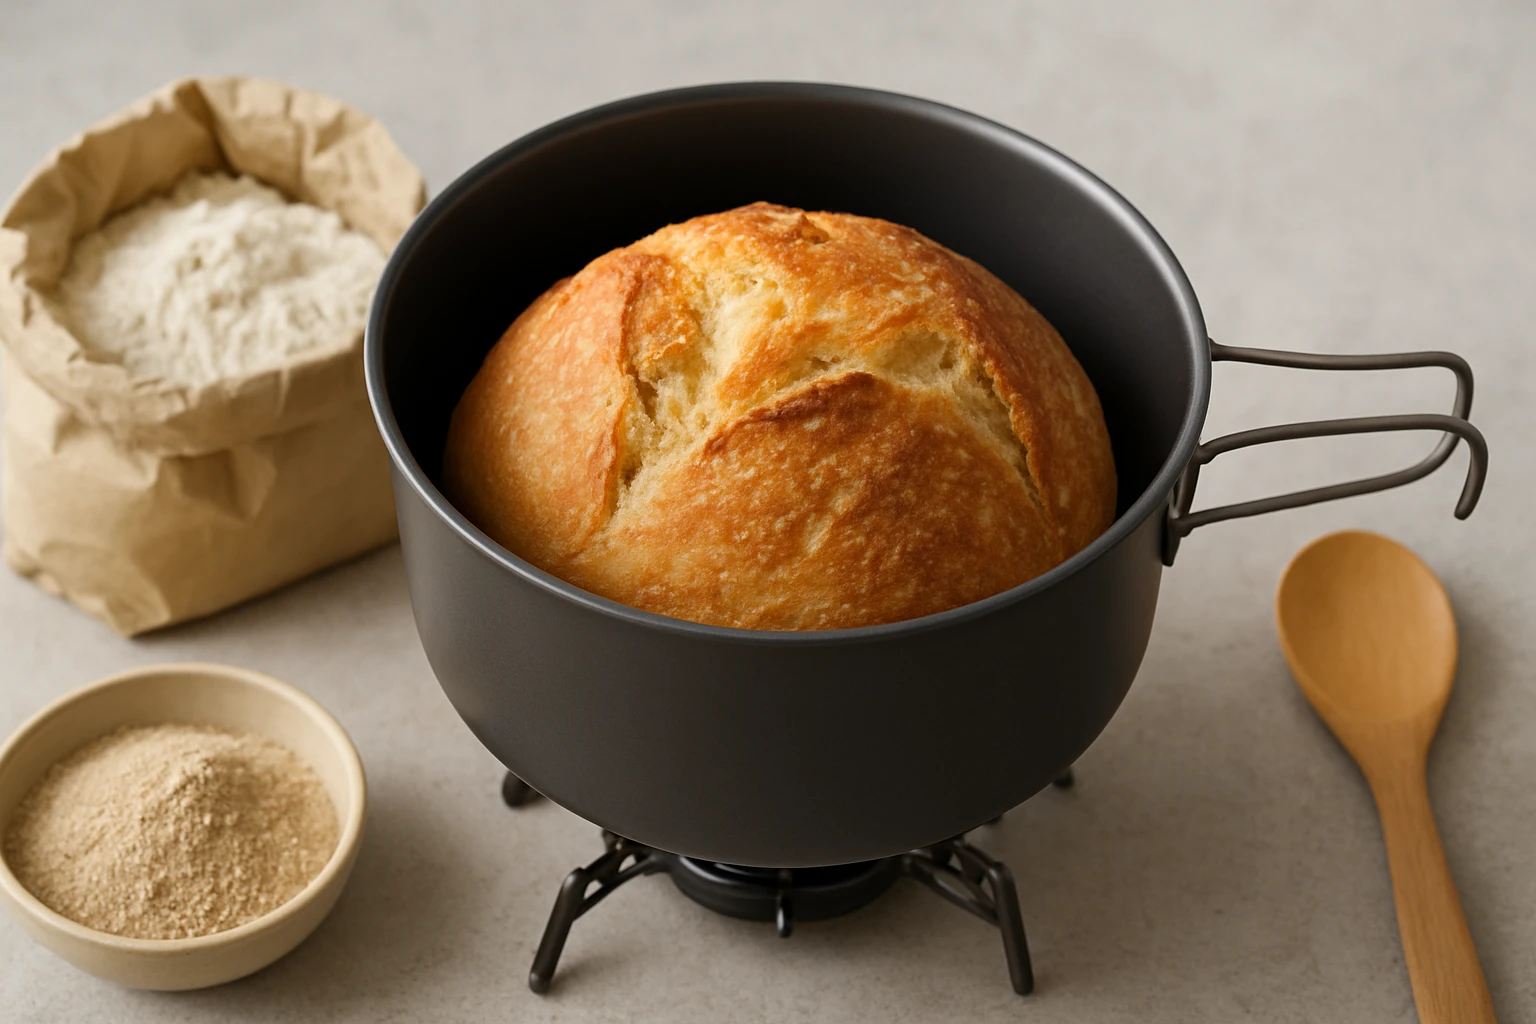
Transfer the rested dough onto a piece of parchment or a lightly oiled surface. Shape it into a round or oval form that fits comfortably inside the titanium pot’s 750 ml capacity. The pot’s round base and anti‑slip design ensure stability during cooking, while the foldable handles make it easy to transport the dough to the fire. Place the shaped dough into the pot, leaving a small gap for expansion.
Step 6 – Prepare the Pot for Baking
Line the interior of the pot with a small sheet of aluminum foil or a silicone mat to prevent sticking and to simplify cleanup. The foil also reflects heat, creating a more oven‑like environment inside the pot. Secure the lid, which features a small handle for safe removal. The titanium construction conducts heat evenly, reducing the risk of hot spots that could scorch the crust.
Step 7 – Cook the Bread
Position the pot over the stove flame or directly on the campfire’s coals, ensuring the heat source contacts the pot’s side rather than the lid. Maintain a moderate temperature; too high a flame will brown the crust before the interior cooks through. Cook for approximately 12‑15 minutes, rotating the pot halfway through to promote uniform heating. Use heat‑resistant gloves when checking the loaf’s progress.
Step 8 – Test for Doneness
Insert a thin wooden skewer into the center of the loaf; if it emerges clean and the bread sounds hollow when tapped, the loaf is fully baked. The titanium pot’s thin walls allow one to feel the bread’s firmness through the lid, providing an additional sensory cue. If the crust appears too dark, remove the pot from the heat and let the bread rest for a few minutes; residual heat will finish the cooking process.
Step 9 – Cool and Serve
Remove the pot from the fire and place it on a flat, insulated surface. Allow the bread to cool for five minutes before extracting it; this prevents the crumb from becoming gummy. Use the pot’s foldable handle to lift the lid, then slide the loaf onto a clean plate or a piece of cloth. Warm bread pairs excellently with trail‑ready toppings such as nut butter, cheese, or dried fruit.
Tips & Pro Tips
- Pre‑measure dry ingredients at home and store them in resealable bags to reduce packing weight.
- For a crispier crust, sprinkle a pinch of sea salt on the dough before baking.
- If altitude is high, increase yeast by 10 % to compensate for lower atmospheric pressure.
- Use a small amount of baking powder alongside yeast for a quicker rise when time is limited.
- The titanium pot’s lightweight nature (123 g) makes it ideal for multi‑day trips where every gram matters.
Troubleshooting
| Problem | Possible Cause | Solution |
|---|---|---|
| Dense, under‑cooked interior | Heat too low or insufficient cooking time | Increase flame slightly and extend cooking by 3‑5 minutes. |
| Burnt crust | Flame too high or direct contact with coals | Raise the pot on a trivet or move it to a cooler part of the fire. |
| Dough does not rise | Water temperature too cold or yeast inactive | Use water warmed to 110°F and ensure yeast is within its expiration date. |
Conclusion
This guide has demonstrated that baking bread on the trail is both feasible and rewarding when using a high‑quality titanium pot. One can enjoy a fresh, nutritious loaf with minimal equipment, preserving valuable pack space for other essentials. By following the step‑by‑step instructions, applying the provided tips, and understanding common pitfalls, any backpacker can master this comforting culinary skill. The experience of breaking warm bread beside a campfire adds a memorable dimension to any wilderness adventure.
Products Mentioned in This Guide
Frequently Asked Questions
What size titanium pot is ideal for baking bread on the trail?
A 750 ml (about 2.5 cup) titanium pot weighing ~123 g works well for a single small loaf.
How should I adjust yeast dough for campfire baking?
Use a slightly higher hydration and a quick-rise (instant) yeast to compensate for variable heat.
Can I use aluminum foil instead of a silicone baking mat in the pot?
Yes, line the pot with foil; it prevents sticking and makes cleanup easy.
How long does a trail‑baked loaf need to cook?
Bake for 12–15 minutes over medium heat, then check for a golden crust and a hollow sound when tapped.
How do I avoid overheating the titanium pot?
Place the pot on a stable stove grate, use a heat‑resistant glove, and keep the flame moderate to prevent scorching.