How to Build a No-Melt Windscreen for Your DIY Ultralight Backpacking Stove
Introduction
Backpackers who rely on lightweight stoves often struggle with wind‑induced heat loss and the risk of flame melt. This guide explains how to construct a reliable, no‑melt windscreen that protects the flame, conserves fuel, and remains ultralight. Readers will learn which materials provide optimal heat resistance, how to customize a windscreen for different stove sizes, and why the RioRand Camp Stove Windshield products are valuable tools in this process. By the end of the article, one will be able to assemble a windscreen that endures breezy conditions without compromising the stove's structural integrity.
What You’ll Need
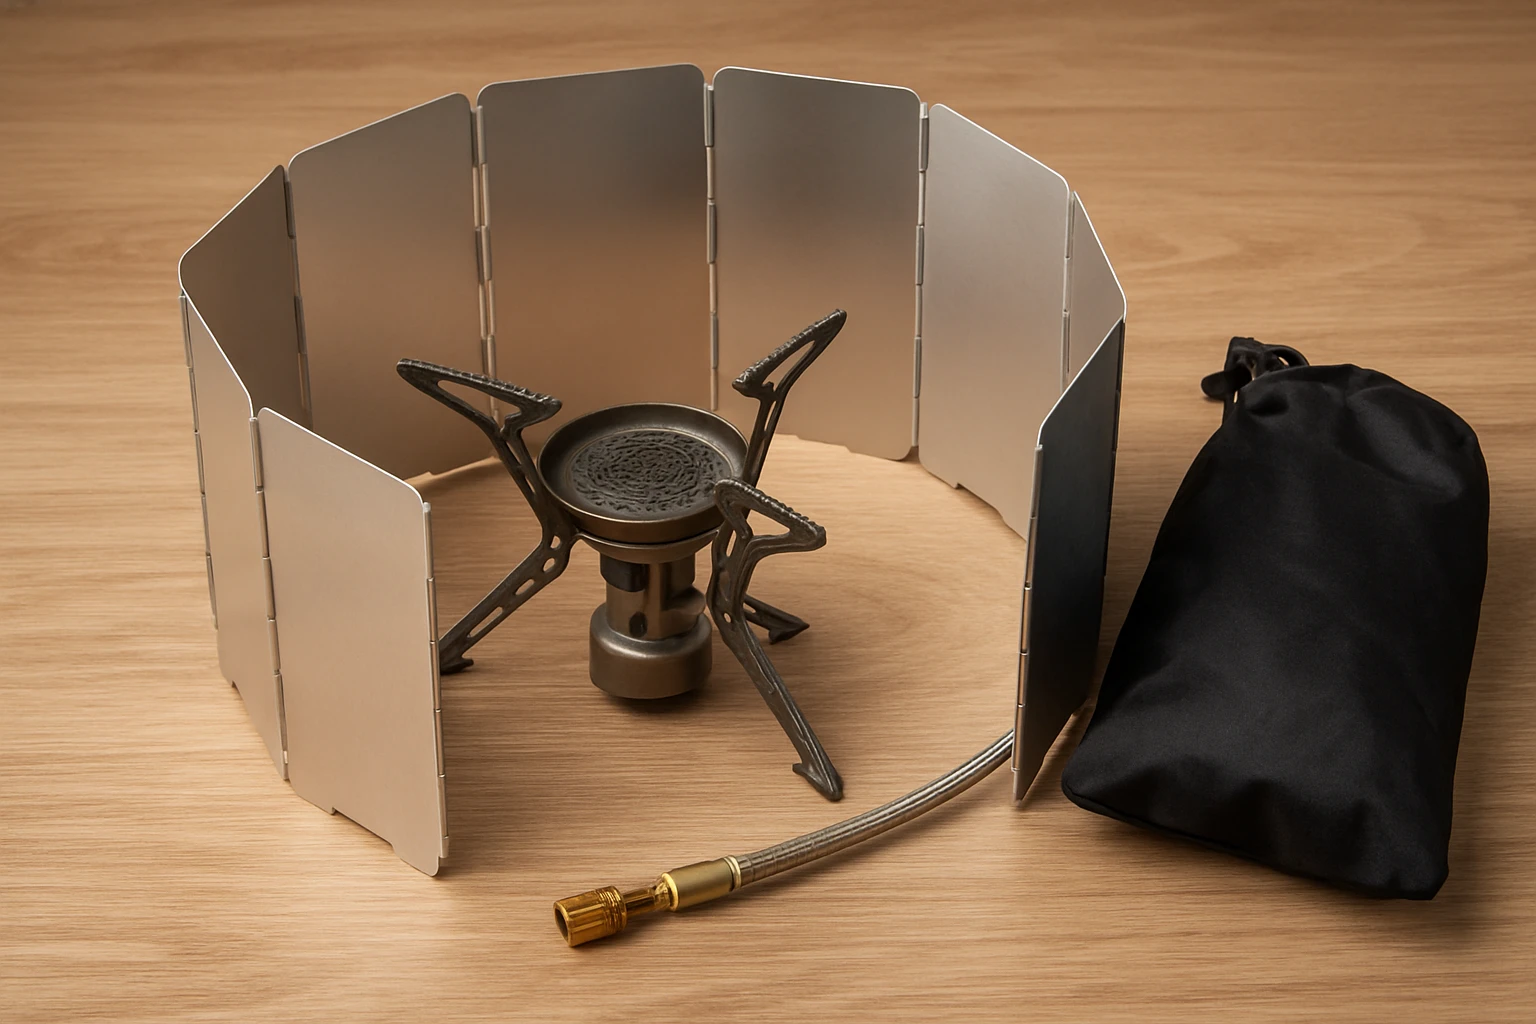
- RioRand Camp Stove Windshield, 12 Plates – $12.99, rating 4.2/5 (1,602 reviews)
- RioRand Camp Stove Windshield, 16 Plates – $16.99, rating 4.2/5 (1,602 reviews)
- Heat‑resistant silicone tape (minimum 250 °F rating)
- Lightweight aluminum or titanium brackets (optional for extra rigidity)
- Heavy‑duty storage pouch (included with RioRand windshields)
- Utility knife or scissors
- Measuring tape
Step 1: Assess Your Stove and Environment
Begin by measuring the base diameter of your backpacking stove and noting the typical wind conditions of your chosen campsite. A stove with a 3‑inch burner will fit comfortably within a 12‑plate configuration, while larger dual‑burner setups may require the 16‑plate model. Understanding the wind speed helps determine how many plates to deploy; stronger gusts benefit from a full 360‑degree barrier.
Step 2: Choose the Appropriate RioRand Windshield
If your stove is compact, select the RioRand Camp Stove Windshield, 12 Plates. Its adjustable length and lightweight aluminum alloy construction (0.57‑0.89 lb) make it ideal for ultralight hikers. For larger stoves or when extra wind protection is desired, the RioRand Camp Stove Windshield, 16 Plates offers the same durability with additional plates for a broader shield. Both models fold flat, fitting easily into the included pouch, thereby preserving pack space.
Step 3: Prepare the Windshield Plates
Unfold the chosen windshield and lay the plates on a clean surface. Using a utility knife, trim any excess material from the edges if the plates extend beyond the stove’s flame radius. This step prevents unnecessary heat buildup on the windscreen itself, reducing the chance of melt. If you intend to secure the windscreen with brackets, drill small pilot holes in the aluminum plates where the brackets will attach.
Step 4: Apply Heat‑Resistant Silicone Tape
Wrap the inner edges of each plate with silicone tape. The tape’s high temperature tolerance (up to 250 °F) creates a barrier that prevents direct flame contact with the metal, eliminating melt risk. Apply the tape in a continuous strip, overlapping slightly to ensure full coverage. This simple addition adds only a few grams to the overall weight but dramatically increases durability.
Step 5: Assemble the Windshield Around the Stove
Position the stove on a level surface and arrange the windscreen plates around it, starting with the lowest plate closest to the flame. Interlock the plates according to the manufacturer’s instructions, ensuring a tight fit that forms a 360‑degree barrier. For the 12‑plate model, you will typically need three rows of four plates each; the 16‑plate version uses four rows of four plates. Secure the structure using the built‑in extendable ground stakes, driving them into dirt, sand, or grass to anchor the windscreen firmly.
Step 6: Test Fuel Efficiency and Stability
Light the stove and observe the flame through the windscreen. A well‑assembled windscreen should reduce fuel consumption by 15‑25 % because the wind is blocked and heat is reflected back toward the burner. If the flame flickers, adjust the plate alignment or add additional plates to close gaps. Verify that the windscreen remains stable; any wobble can lead to uneven heating and potential melt points.
Step 7: Pack the Windshield for Travel
After use, allow the windscreen to cool completely. Fold the plates back into their original flat configuration and store them in the heavy‑duty pouch that accompanies each RioRand product. The pouch’s reinforced stitching protects the plates from damage during transport, and its compact size ensures it occupies minimal space in your backpack.
Tips & Pro Tips
- When camping in extreme cold, consider adding an extra layer of reflective Mylar behind the windscreen to further retain heat.
- For multi‑day trips, carry a spare set of silicone tape; it adheres well even after repeated heating cycles.
- If you frequently use a dual‑burner stove, the 16‑plate windshield provides a wider shield without adding significant weight.
- Position the ground stakes at a slight angle away from the stove to maximize wind resistance while maintaining stability.
Troubleshooting
| Problem | Possible Cause | Solution |
|---|---|---|
| Flame flickers despite windscreen | Gaps between plates | Re‑align plates and ensure all edges are overlapped with silicone tape. |
| Windshield feels hot to touch | Direct flame contact | Apply additional silicone tape or increase distance between flame and inner plate. |
| Windshield collapses in strong wind | Insufficient anchoring | Drive ground stakes deeper and use optional aluminum brackets for extra rigidity. |
Conclusion
By following these steps, one can construct a no‑melt windscreen that enhances fuel efficiency, protects the flame, and remains ultralight for backpacking adventures. The RioRand Camp Stove Windshield models provide a versatile, adjustable foundation that adapts to a range of stove sizes, while heat‑resistant silicone tape adds an extra layer of safety. Whether trekking through windy alpine passes or cooking at a breezy campsite, this windscreen ensures reliable performance and peace of mind.
Products Mentioned in This Guide
Frequently Asked Questions
What materials are recommended for a no‑melt windscreen on an ultralight backpacking stove?
Use heat‑resistant silicone tape (≥250 °F) and lightweight metal plates such as the RioRand Camp Stove Windshield plates.
How do I size a windscreen for different stove models?
Measure the stove’s flame height and base diameter, then select the 12‑plate or 16‑plate RioRand set that best matches those dimensions.
Can the windscreen be assembled without tools?
Yes, the plates snap together and the silicone tape secures edges, allowing tool‑free construction in the field.
Will the windscreen affect stove performance or safety?
A properly fitted windscreen protects the flame from wind, improves fuel efficiency, and does not interfere with the stove’s pressure or stability.
How much does a complete no‑melt windscreen weigh?
The combined weight of the RioRand plates and a short strip of silicone tape is typically under 30 g, keeping the setup ultralight.