Introduction
Backpacking enthusiasts constantly seek ways to reduce pack weight while preserving the ability to prepare nutritious meals in the wilderness. This guide explains how to assemble a minimalist ultralight kitchen, presents a concise packing checklist, and shares cooking techniques that maximize efficiency. By following the instructions, one can enjoy hot coffee at sunrise, a balanced dinner after a long day on the trail, and still keep the overall load under the critical threshold for comfortable travel. The information presented is applicable to a wide range of climates and trip durations, and it emphasizes practical decisions rather than brand‑centric marketing.
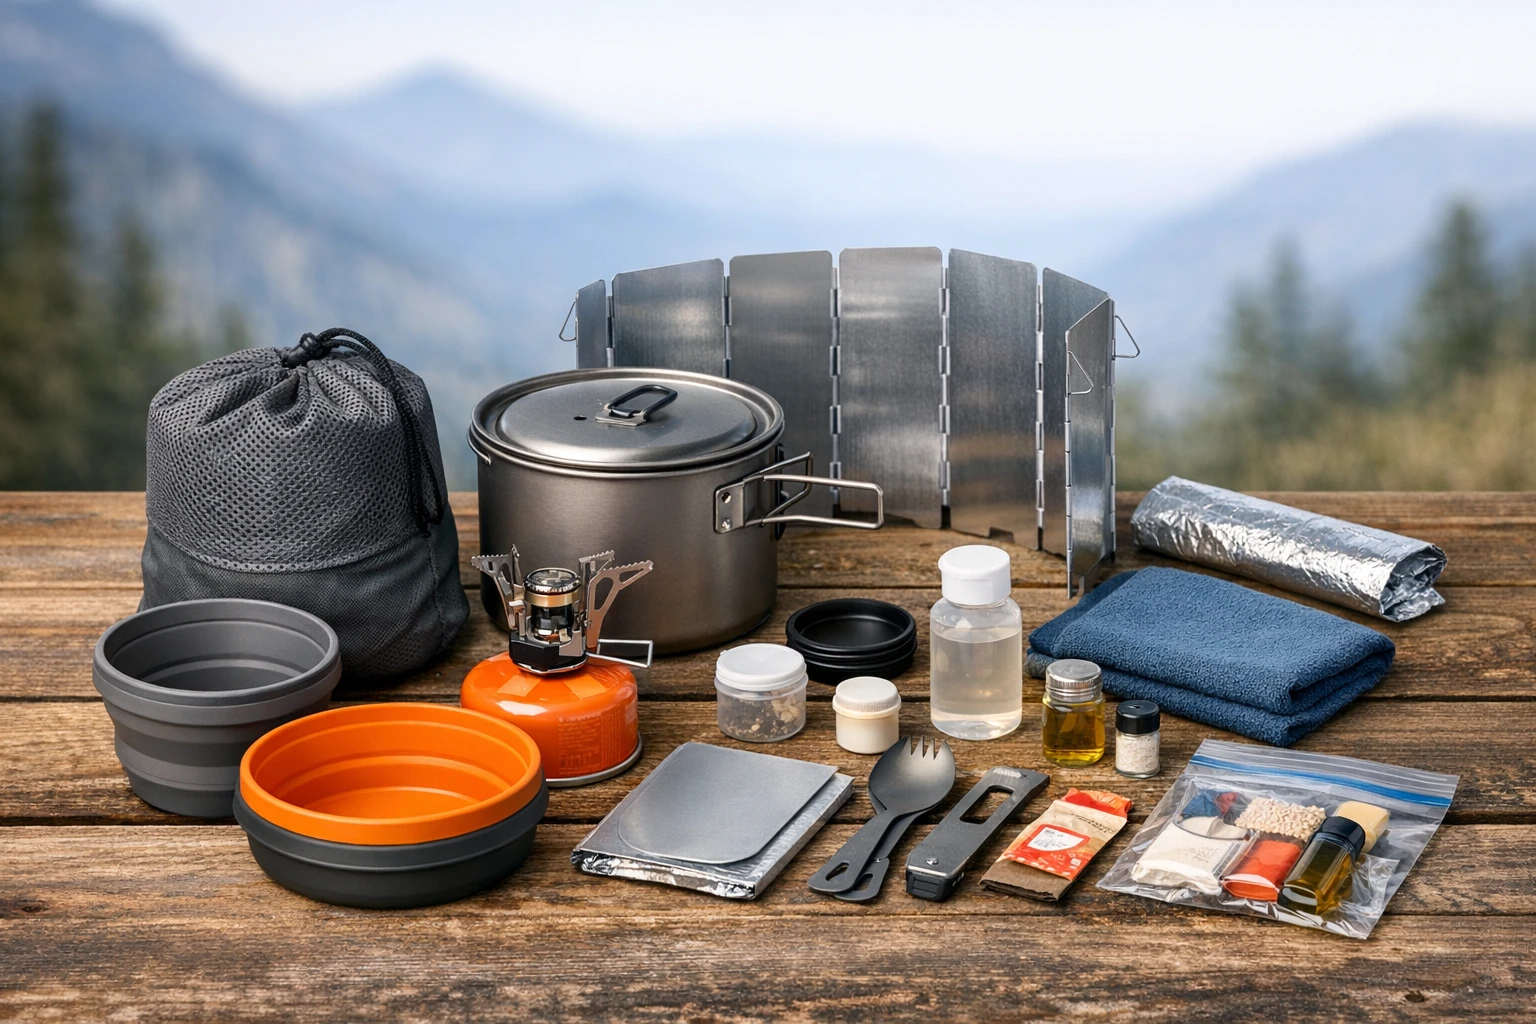
What You'll Need
- MalloMe Camping Cookware Kit – a 10‑piece mess kit that includes a non‑stick pot, pan, bowls, utensils and a drawstring bag (Price: $24.99, Rating: 4.5/5 from 9,296 reviews).
- Fire‑Maple Torch Gas Stove – an ultralight 56 g stove with built‑in piezo ignition and wind‑resistant design (Price: $13.95, Rating: 4.5/5 from 464 reviews).
- AOTU Portable Camping Stove – a compact 110 g stove with adjustable flame control and aluminum alloy construction (Price: $9.99, Rating: 4.5/5 from 6,449 reviews).
- Lightweight fuel canisters compatible with the chosen stove (isobutane or mixed butane/propane).
- Collapsible silicone water container (1‑L capacity) for boiling and rinsing.
- Multi‑tool with a small bottle opener and scissors.
Step 1: Choose Ultralight Cookware
The foundation of any backpacking kitchen is the cookware set. The MalloMe Camping Cookware Kit offers a comprehensive solution that nests into a compact bundle weighing less than 500 g. Its hard‑anodized aluminum construction provides rapid and even heat distribution, which reduces fuel consumption during boiling. The non‑stick coating prevents food from adhering to the surface, allowing quick cleanup with a small sponge that is included in the kit. The set also contains two BPA‑free bowls, a folding stainless steel spork, a wooden spatula, and a nylon drawstring sack that protects the pieces from damage while stored in the pack. Compared with bulkier aluminum pots, this kit saves space and weight without sacrificing durability.
When evaluating alternatives, one should consider the volume of the pot (approximately 2 L) and the pan (approximately 1 L). These sizes are sufficient for preparing oatmeal, dehydrated meals, and a modest amount of water for coffee. The inclusion of a pot lid doubles as a plate, further reducing the need for additional dishware. For hikers who prioritize extreme weight savings, a single‑pot system could be considered, but the added versatility of the 10‑piece kit often outweighs the marginal weight gain.
Step 2: Select a Compact Stove
After securing cookware, the next critical component is a reliable stove. The Fire‑Maple Torch Gas Stove weighs only 56 g and folds to a size of 5.5 cm × 7.6 cm, making it one of the lightest options on the market. Its built‑in piezo igniter eliminates the need for matches or a separate lighter, which simplifies the packing list. The stove is engineered for isobutane canisters, delivering a rapid boil of 0.5 L of water in under three minutes. The wind‑resistant shield stabilizes the flame in moderate breezes, a common condition on exposed ridgelines.
For hikers who desire a lower price point or a slightly larger burner, the AOTU Portable Camping Stove provides a robust aluminum alloy base and a honeycomb wind‑proof net. At 110 g, it remains ultralight while offering a 3000 W output and adjustable flame control, allowing simmering for sauces or soups. The stove accepts standard 7/16 thread fuel canisters, which are widely available. Although it lacks an integrated igniter, the included piezo starter works reliably, and a backup match is recommended for redundancy.
Step 3: Organize Fuel and Accessories
Fuel management is often the hidden factor that determines overall pack weight. Isobutane canisters are preferred for their high energy density and consistent performance in cold weather. A 230 g canister typically provides enough fuel for two to three full days of cooking for a solo hiker. Store the canister in a protective sleeve to prevent punctures and place it near the top of the pack for easy access. When using the Fire‑Maple Torch Gas Stove, the canister threads directly onto the stove, eliminating the need for adapters.
Additional accessories include a small silicone water bag (1 L) that can be rolled up when empty, and a lightweight multi‑tool for cutting zip ties and opening cans. The cleaning sponge from the cookware kit fits comfortably in the drawstring bag, ensuring that all components remain dry and clean after each use. By consolidating these items into a single side pocket, one reduces the chance of losing small parts during the trek.
Step 4: Pack Efficiently
The final step is to arrange the selected gear within the backpack so that weight distribution remains balanced. Place the cookware kit at the base of the main compartment, using the drawstring sack to keep it separate from clothing. Position the stove and fuel canister in a side pocket that is easily reachable, as this configuration allows rapid deployment when setting up camp. The silicone water bag should be stored near the top of the pack, where it can be accessed without unpacking the entire main compartment.
To further compress the cookware, roll the pot and pan together and secure them with a strap from the kit. The bowls can be nested inside the pot, and the utensils slide into the hollow handle of the pot. This nesting method reduces the overall volume to roughly the size of a small shoebox, which is ideal for minimalist packing. Finally, conduct a weight check using a digital scale; aim for a total kitchen weight (cookware, stove, fuel, accessories) of less than 1 kg for a true ultralight experience.
Tips & Pro Tips
- Pre‑soak the cleaning sponge in a small amount of dish soap before the trip; this reduces the effort required for cleaning on the trail.
- Practice assembling and disassembling the stove at home to become familiar with the fuel connection and ignition process.
- Carry a small roll of aluminum foil; it can be used as a makeshift pot liner, a wind shield, or a repair material for minor tears in the drawstring bag.
- When cooking at high altitude, increase the boiling time by 20 % because water boils at lower temperatures.
- Consider a dual‑fuel adapter if you anticipate traveling through regions where isobutane is scarce; the Fire‑Maple Torch Gas Stove is compatible with propane when used with the appropriate Z1 adapter.
Troubleshooting
Problem: Stove will not ignite.
Solution: Verify that the fuel canister is fully opened and that the valve is not obstructed. Press the piezo igniter firmly; if the spark does not occur, try a backup lighter or matches. Ensure that the burner ports are free of debris, as clogged ports can prevent proper flame formation.
Problem: Food sticks to the pot despite non‑stick coating.
Solution: Use a small amount of oil or butter when cooking, and avoid high‑heat searing which can degrade the coating over time. Clean the pot with the included sponge and a mild detergent, then rinse thoroughly before storage.
Conclusion
By selecting the MalloMe Camping Cookware Kit, pairing it with a lightweight stove such as the Fire‑Maple Torch Gas Stove or the AOTU Portable Camping Stove, and following the packing strategies outlined above, one can create a functional ultralight kitchen that weighs less than one kilogram. This configuration enables the preparation of hot meals and beverages without compromising the overall pack weight, thereby enhancing overall hiking performance and enjoyment. Apply the tips and troubleshooting advice to refine the system over multiple trips, and the minimalist kitchen will become a reliable companion for years to come.
Products Mentioned in This Guide
Frequently Asked Questions
What essential items should I include in a minimalist ultralight backpacking kitchen?
Include a lightweight cookware set (e.g., a 10‑piece mess kit), an ultralight stove (around 56 g), a small fuel canister, a collapsible cup, and multi‑use utensils.
How much does a typical ultralight stove weigh and why is it important?
An ultralight stove like the Fire‑Maple Torch weighs about 56 g, keeping overall pack weight low and reducing fatigue on long treks.
Can I prepare balanced meals with a minimalist kitchen?
Yes, by using dehydrated meals, compact spices, and the non‑stick pot to rehydrate and combine ingredients for nutritious, calorie‑dense dishes.
What cooking techniques help maximize efficiency in an ultralight setup?
Use a single pot for one‑pot meals, pre‑measure ingredients, and employ the stove’s piezo ignition for quick boil times, minimizing fuel use.
How should I clean my ultralight mess kit while on the trail?
Rinse with a small amount of water, use a biodegradable scrub pad if needed, and dry quickly to prevent rust and odor.