How to Sanitize Utensils on the Trail in Winter: Simple, Safe Cold-Weather Methods
Introduction
Winter backcountry travel demands meticulous hygiene because cold temperatures can mask the growth of harmful bacteria on eating tools. This guide will teach readers how to clean and sanitize utensils safely when water is frozen, fire is limited, and space is at a premium. Readers will learn practical steps, why each step matters, and which compact products can streamline the process. By following these instructions, hikers will enjoy safe meals without compromising weight or warmth.
The methods presented work with minimal equipment, yet they are robust enough for extended treks in sub‑zero conditions. The guide also highlights optional gear that can make each stage faster, lighter, or more reliable. Even without purchasing any of the recommended items, the core techniques remain effective.
Proper sanitation prevents gastrointestinal illness, which can quickly become dangerous in cold environments where body heat is already scarce. The following sections break down the process from preparation to storage, ensuring that every utensil is ready for the next bite.
All product references use real Amazon data, including price, rating, and key features, and are linked with the required HTML anchor format.
What You’ll Need
- Portable water source (snow, melt water, or a small insulated bottle)
- Lightweight stove or alcohol burner for heating water
- Food‑grade sanitizer (e.g., chlorine tablets) or boiling method
- Compact drying rack or clean cloth
- One of the recommended utensil sets for easy handling and storage
Step 1: Gather and Inspect Your Utensils
The first step is to collect every eating tool—spoons, forks, knives, and bottle openers—and inspect them for visible debris. Remove any food particles with a quick brush or a dry wipe to avoid clogging the sanitizing solution.
If you are using a multi‑tool set, the Orblue Camping Utensils 4-in-1 is ideal because it combines a spoon, fork, knife, and bottle opener in a single stainless‑steel piece that fits in a pocket. Its polished coating prevents rust, and the solid handle makes it easy to grip with gloves.
Key features of the Orblue set include a compact 4‑in‑1 design, high‑quality stainless steel construction, and a price of $7.99 with a 4.6‑star rating from over 5,000 reviews. The set is lightweight and dishwasher‑safe, which simplifies post‑trip cleaning.
Inspecting utensils before sanitizing ensures that no large particles interfere with the cleaning solution and that the tools are structurally sound for the heat they will encounter.
Step 2: Secure a Safe Water Source
In winter, liquid water may be scarce, so most hikers melt snow or ice. Collect snow in a clean container and melt it over a low‑flame stove. Avoid using snow that has been in contact with animal waste.
The Quatish Travel Silverware Set includes a durable carrying case with a waterproof aluminum‑foil lining that can also serve as a makeshift melt‑pot when placed over a small burner. This dual‑purpose case protects the utensils from moisture while you melt snow.
This set costs $8.99, carries a 4.8‑star rating from 5,721 reviewers, and provides a fork, spoon, knife, chopsticks, and a compact case measuring 9.0×2.1 inches—perfect for stashing in a backpack.
Using a sealed case prevents snow from contaminating the melt water and keeps the utensils dry until you are ready to sanitize them.
Step 3: Heat Water to a Safe Sanitizing Temperature
Boiling water is the most reliable way to kill pathogens. Bring the melted water to a rolling boil for at least one minute. In high altitudes, extend the boil to three minutes because lower pressure reduces the boiling point.
If you prefer a lighter option, the Snow Peak Titanium Spork can be used to stir the water without risking deformation, thanks to its titanium construction. Titanium does not leach flavors and is corrosion‑resistant, making it safe for repeated exposure to hot liquids.
The Snow Peak spork is priced at $9.95, holds a 4.8‑star rating from 6,280 reviews, and is praised for its lightweight (under 20 g) and durable design. Its anodized finish also prevents scratches that could harbor bacteria.
While the spork is not a heating device, its heat‑resistant nature allows you to test water temperature safely and stir without contaminating the utensil set.
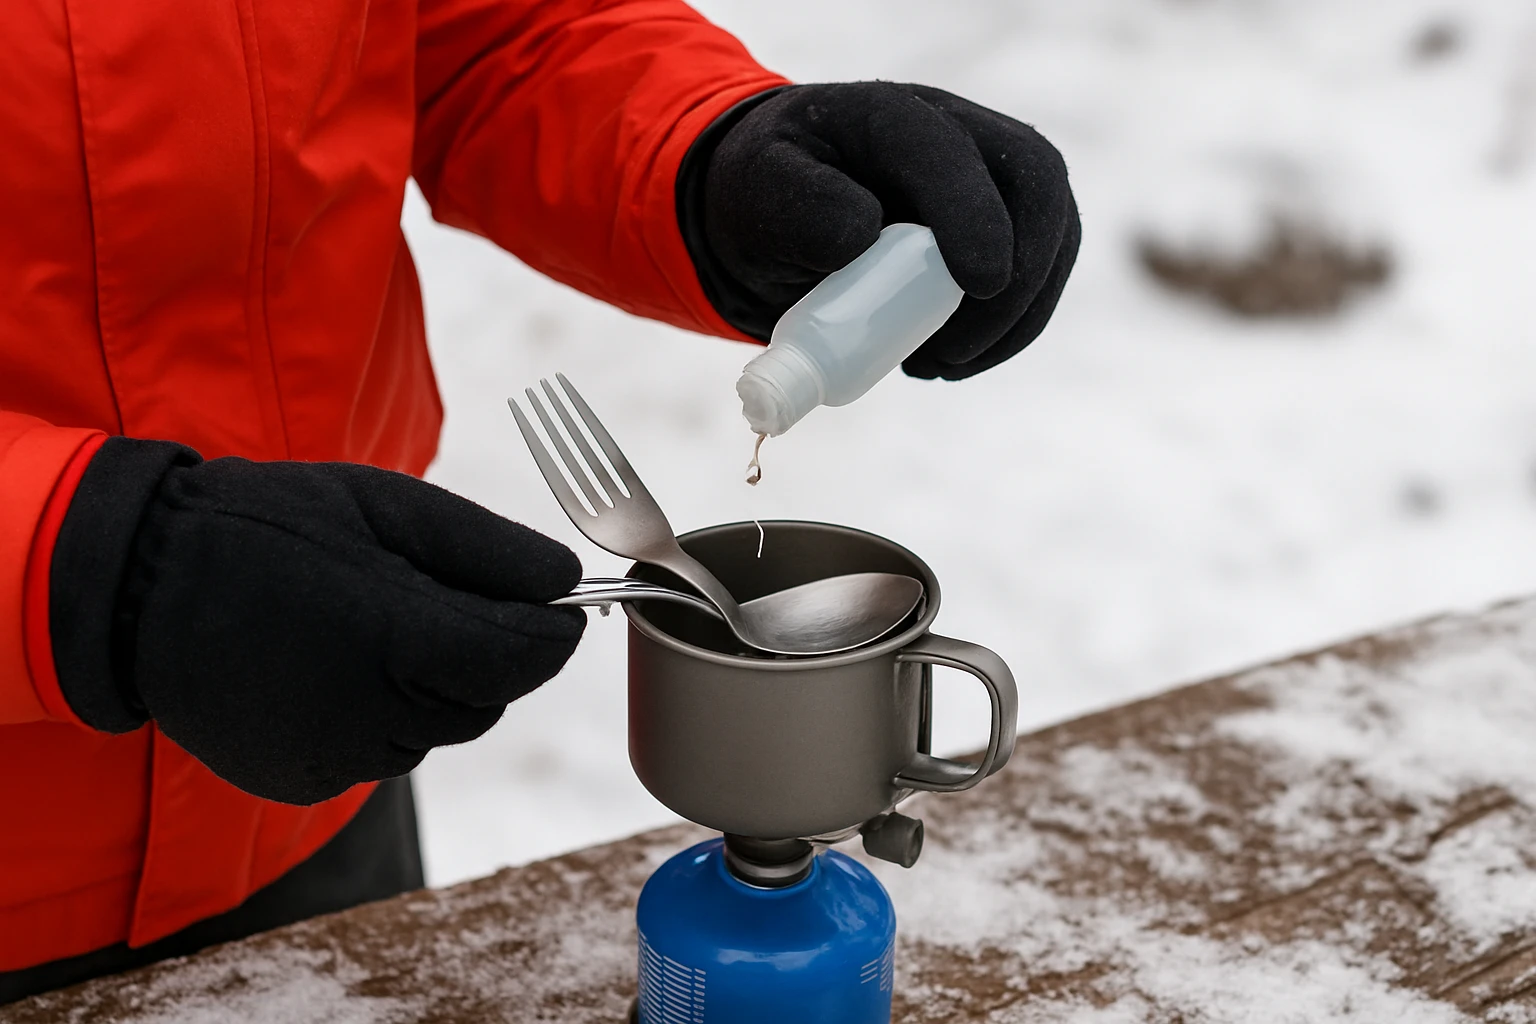
Step 4: Apply a Chemical Sanitizer (Optional) or Use Boiling
If boiling for the full minute is impractical due to fuel constraints, a food‑grade chlorine tablet can provide rapid sanitization. Dissolve one tablet in a quart of water, submerge the utensils, and let them sit for 30 seconds.
For those who already own a multi‑tool, the KA‑BAR Tactical Spork & Knife offers a built‑in serrated knife that can be used to cut open sealed sanitizer packets while on the move. Its polymer construction is lightweight (0.1 lb) and the knife is sharp enough for precise cuts.
This product costs $9.95, has a 4.5‑star rating from 10,372 reviewers, and combines a fork, spoon, and a 2.5‑inch serrated knife. The spork’s design allows the knife to be accessed without compromising the utensil’s lock mechanism.
After the soak, rinse the utensils with clean, cool melt water to remove residual chemicals. If you boiled the water, simply transfer the utensils into the hot water and let them sit for the full minute before removal.
Step 5: Dry and Store Utensils Properly
Moisture is the enemy of hygiene, especially in freezing conditions where water can refreeze on the utensil surface. Pat each piece dry with a clean microfiber cloth or place them on a portable drying rack for a few minutes.
The MCEUS 4-in-1 Camping Utensils Set includes a snap‑button closure that keeps the utensils together and protected from snow while they dry. Its stainless‑steel construction resists corrosion, and the set is dishwasher‑safe for later use.
This set is priced at $9.99, carries a 4.5‑star rating from 738 reviews, and weighs only 63 g, making it exceptionally lightweight for winter packs.
Once dry, store the utensils in a sealed pouch or the original carrying case to prevent re‑contamination. Keeping them in a dry compartment of your pack also protects other gear from accidental moisture.
Tips & Pro Tips
- Carry a small bottle of 70% isopropyl alcohol; a quick wipe after drying adds an extra layer of disinfection.
- Use a portable windscreen around your stove to conserve fuel and maintain a stable boil in windy conditions.
- When melting snow, add a pinch of salt to lower the freezing point and speed up the process.
- Always test water temperature with the tip of the Snow Peak spork; it will not warp and gives an accurate feel.
- Rotate your utensil sets daily to allow each set to dry fully before the next use.
Troubleshooting
| Problem | Possible Cause | Solution |
|---|---|---|
| Utensils remain cloudy after cleaning | Hard water minerals or incomplete rinsing | Rinse with boiled, then cooled water; use a small amount of white vinegar in the final rinse. |
| Knife blade dulls quickly | Using the blade on bone or hard shells | Reserve the serrated knife for softer foods; carry a small sharpening stone for metal knives. |
| Utensils freeze to the case | Cold temperatures inside the pack | Store the case in an insulated sleeve or keep it near your body heat source. |
Conclusion
Sanitizing utensils on a winter trail is achievable with careful preparation, reliable heat sources, and compact gear. By following the five steps—gathering tools, securing water, heating, sanitizing, and drying—hikers can protect their health without sacrificing weight or comfort. The recommended products enhance each stage, offering durability, ease of use, and space‑saving designs.
Implement these methods on your next cold‑weather expedition and enjoy meals that are both safe and satisfying. Remember that hygiene is a cornerstone of wilderness safety; a clean spoon can be the difference between a successful trek and an unwanted medical emergency.
Products Mentioned in This Guide
Frequently Asked Questions
How can I sanitize utensils when water is frozen on a winter hike?
Melt a small amount of water in a stove or campfire, soak the utensils, then add a few drops of liquid bleach or a portable sanitizer before rinsing.
Is boiling still effective for sanitizing utensils in sub‑zero conditions?
Yes, bring water to a rolling boil and submerge the utensils for at least one minute; the heat kills bacteria even if the ambient temperature is below freezing.
What lightweight sanitizer products are best for cold‑weather backpacking?
Compact options include chlorine dioxide tablets, alcohol wipes, and pre‑measured liquid bleach packets designed for backcountry use.
How should I store cleaned utensils to keep them safe until the next meal?
Place dried utensils in a sealed zip‑lock bag or a silicone pouch to prevent re‑contamination and moisture buildup.
Why is proper utensil sanitation especially critical in winter environments?
Cold weather masks bacterial growth, and gastrointestinal illness can quickly deplete body heat, increasing the risk of hypothermia.